
My prize winning pumpkin at the age of 5.
I spent most of my childhood summers helping my mom and grandmother manage their gardens. My grandmother had beautiful tomatoes, cucumbers and a flourishing herb garden. My mom grew almost every vegetable I ate. We had pumpkins, squash, corn, tomatoes, green beans, herbs, zucchini, cucumbers and watermelon, to name a few. To say the least, I was spoiled with delicious summer produce and a genetic green thumb.
Now that I own my house, I can’t wait to start digging up part of my lawn to build my own garden. I’ve even browsed around plenty on the Internet looking for ideas on how to design the garden. I mean, sure, I can grow all the veggies and herbs, but I still need some inspiration for the aesthetic of the whole thing. I’d love for my garden to both provide colorful, nutritious food and look good! So many websites have such inspiring ideas for home gardens and landscaping, like the Westminster Stone website (you can browse their garden paving here). Just reading through the plethora of ideas makes me want to start digging up my lawn and get the garden going. Maybe soon. For now, though, I’ve settled with an indoor garden featuring vegetables from kitchen scraps. About a year ago I was browsing through Pinterest and saw an article about how to grow vegetables from your kitchen scraps, and I was intrigued. I always felt annoyed with the scraps of food I threw out after cooking: celery ends, lettuce bottoms, green onion roots, and pineapple tops. I decided to try out the tricks listed on the regrow article, and I’m glad I did.

From left to right: Start of yellow onion, lettuce, green onion, celery, basil, lemongrass, potato, leaves from pineapple
Since I started regrowing kitchen scraps I have multiple heads of lettuce and celery that I can split and make more of, a basil plant that is about 2 feet tall, more green onions than I thought I would ever need, the start of a pineapple tree, a potato root about ready to plant, and so many red and yellow onions that I’ve started to give them away.
I can’t wait to take my indoor regrow garden outside this summer, but for now I’ll stick with my small herb garden and my kitchen scraps. Stay tuned for a follow up on my summer garden and more kitchen scrap experiments. Below are my tips for regrowing the easiest types of veggies and I hope that you have as much success as I have!
Â
Celery: Chop off the head of lettuce about 2-3 inches above the base. Place the base of lettuce, stalks up, in a small bowl of water and in direct sunlight. Make sure the base is always half submerged in water and spritz the top of the celery stalks daily. You should start to see some leaves appear in about 1-2 weeks. Once the leaves appear, peal back the outside stalks so the only celery left are the stalks with leaves. Place celery in moist soil and water when the soil feels dry. The celery should continue to grow and will be ready to be harvested when stalks are roughly 8-10 inches tall. You can continue to repeat this method for every celery head you regrow.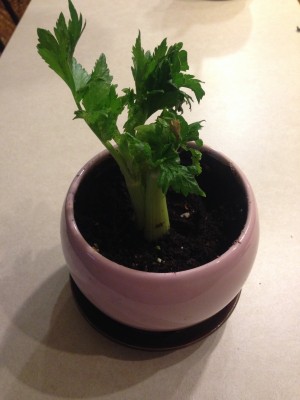
Lettuce: Lettuce was tricky for me at first, I never knew if I was over or under watering the plant. Cut off the base of the lettuce about 4 inches from the bottom. Submerge half of the lettuce in a bowl of water and in direct sunlight. Mist the top of the lettuce daily and maintain at least 1/2 of the lettuce submerged in water. New leaves should start to appear in about two weeks. Plant the entire lettuce plant, after pulling off the slimy leaves, into soil with the old leaves under the soil and new growth above.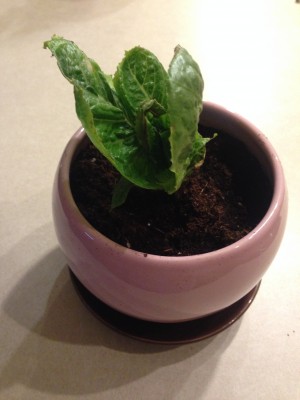
Green Onions: This is my favorite scrap to replant, mostly because it’s the most rewarding. Cut the green onions at the base about an inch above the “wrapper” of the plant. Place the base in a bowl of water and in direct sunlight. I have let my onions go for about 2 months in the water, cutting off some to cook with when needed. This plant grows so quickly that you need to keep up with trimming it so the onion stalks don’t get too heavy. After about 2 months I planted them in soil and have kept trimming them weekly. Water the base of the plant every other day, so the soil stays moist.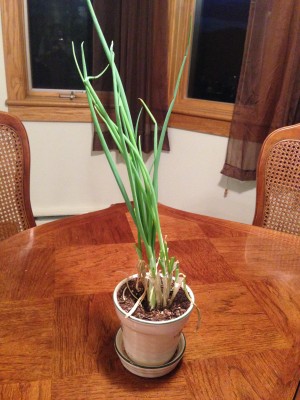
Â